Compact Bathroom Layout Strategies That Work
Designing a compact bathroom requires thoughtful planning, smart storage decisions, and careful attention to visual balance. Limited square footage does not mean limited comfort. With the right layout strategies, even the smallest bathrooms can feel efficient, organized, and inviting.
Whether you are remodeling an existing bathroom or planning a new one in a tight footprint, strategic layout choices can dramatically improve usability and appearance. The following guide explains practical techniques that help compact bathrooms function better without sacrificing style.
Understand the Core Principles of Compact Bathroom Planning
Before selecting fixtures or finishes, it is important to focus on layout fundamentals. A compact bathroom succeeds when movement flows naturally and each element serves a purpose.
Strong compact layouts typically include:
- Clear circulation paths
- Wall-mounted fixtures where possible
- Integrated storage solutions
- Balanced lighting placement
- Visual continuity across surfaces
Planning with intention ensures that the space works efficiently from day one.
Choose a Space-Smart Fixture Arrangement
Fixture placement determines how comfortable a compact bathroom feels. The right configuration prevents congestion and supports easy movement.
Align Fixtures Along One Wall
Placing the toilet, sink, and shower along the same wall simplifies plumbing and frees floor space. This approach creates a cleaner visual line and improves accessibility.
Benefits include:
- Easier installation
- Better use of narrow layouts
- More open walking space
- Improved visual organization
This strategy works especially well in long or narrow bathrooms.
Use Corner Installations When Possible
Corners often go unused in compact bathrooms. Installing fixtures in these areas improves efficiency.
Smart corner solutions include:
- Corner sinks
- Corner showers
- Corner shelving units
- Corner storage cabinets
These placements open up central floor space for easier movement.
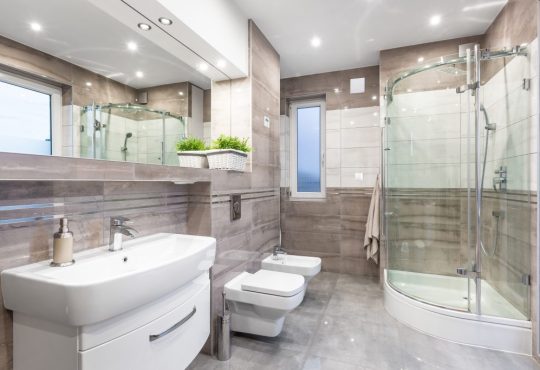
Select Wall-Mounted Fixtures to Increase Floor Visibility
Wall-mounted elements instantly make bathrooms feel larger because they expose more floor area.
Consider installing:
- Floating vanities
- Wall-mounted toilets
- Floating storage cabinets
- Wall-mounted faucets
Visible flooring creates a stronger sense of openness and improves cleaning accessibility as well.
Replace Bathtubs With Walk-In Showers
Traditional bathtubs consume valuable square footage. In compact bathrooms, replacing a tub with a walk-in shower often improves usability.
Advantages include:
- More flexible layout options
- Better accessibility
- Cleaner visual lines
- Increased perceived space
Glass shower enclosures help maintain openness while preventing water spread.
Install Sliding Doors Instead of Hinged Doors
Door clearance can interfere with fixture placement in tight bathrooms. Sliding doors solve this issue effectively.
Popular choices include:
- Pocket doors
- Sliding barn-style doors
- Sliding glass shower panels
These alternatives free up space that traditional swing doors require.
Maximize Vertical Storage Opportunities
Vertical space is essential in compact bathrooms. Using height instead of width increases storage capacity without crowding the layout.
Effective vertical storage options include:
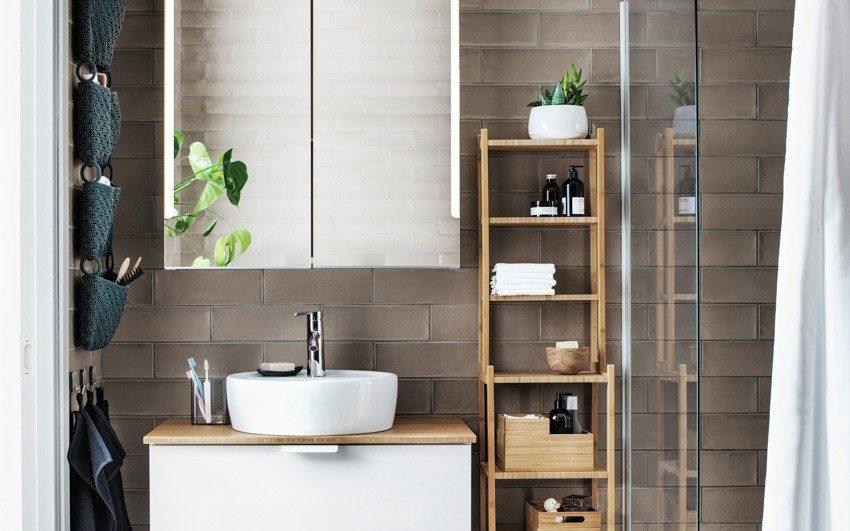
- Tall linen cabinets
- Floating shelves
- Recessed wall niches
- Over-toilet shelving units
Vertical organization keeps essentials accessible while preserving floor area.
Use Recessed Storage to Reduce Bulk
Recessed storage blends into the wall instead of extending into the room.
Examples include:
- Shower niches
- Recessed medicine cabinets
- Built-in shelving between wall studs
These features provide storage without interrupting circulation space.
Select a Compact Vanity That Provides Storage
The vanity often becomes the focal point of a small bathroom. Choosing the right size and style makes a noticeable difference.
Look for vanities that include:
- Integrated drawers
- Narrow depth profiles
- Floating installation
- Open shelving below
A properly scaled vanity improves both storage and movement.
Keep the Layout Visually Simple
Too many materials or competing colors can make a compact bathroom feel crowded.
Maintain simplicity by:
- Limiting the number of finishes
- Choosing cohesive color palettes
- Keeping decorative elements minimal
- Using consistent hardware styles
Visual consistency helps the room feel calmer and larger.
Use Light Colors to Expand the Space
Light tones reflect illumination and soften boundaries.
Effective compact bathroom color choices include:
- Warm white
- Soft gray
- Pale beige
- Light taupe
Using similar tones across walls, cabinetry, and flooring enhances visual continuity.
Install Large Mirrors to Increase Depth
Mirrors are one of the most effective tools for improving spatial perception in small bathrooms.
Strategic mirror placement can:
- Reflect natural light
- Expand visual boundaries
- Brighten darker corners
- Create symmetry above vanities
Large mirrors often make the most dramatic impact.
Choose Compact Yet Functional Lighting Layers
Lighting improves both usability and comfort in tight bathrooms.
A well-planned lighting layout includes:
Ambient Lighting
Provides general illumination through ceiling fixtures or recessed lighting.
Task Lighting
Supports grooming activities with vanity lighting near mirrors.
Accent Lighting
Highlights niches, shelving, or architectural features to add depth.
Balanced lighting prevents shadows that can make compact bathrooms feel smaller.
Select Space-Efficient Toilet Designs
Compact toilets improve circulation without sacrificing performance.
Consider options such as:
- Wall-mounted toilets
- Short projection toilets
- Dual-flush compact models
These designs preserve valuable floor area.
Extend Visual Continuity With Large Tiles
Tile size influences how spacious a bathroom appears. Larger tiles create fewer grout lines, which reduces visual interruption.
Recommended tile strategies include:
- Large wall tiles
- Large-format floor tiles
- Matching wall and floor tile tones
- Vertical tile installation for height emphasis
Consistent tile patterns visually expand compact spaces.
Install Glass Shower Panels Instead of Curtains
Shower curtains create visual barriers that divide the room.
Glass panels help by:
- Allowing light to travel freely
- Maintaining sightlines
- Enhancing openness
- Creating a cleaner appearance
Clear glass works especially well in tight layouts.
Keep Plumbing Walls Organized
Grouping plumbing fixtures along shared walls improves efficiency.
Benefits include:
- Reduced installation complexity
- Lower renovation costs
- Cleaner layout alignment
- Easier maintenance access
Efficient plumbing planning supports long-term functionality.
Add Smart Storage Accessories Inside Cabinets
Cabinet interiors can hold more than expected with proper organization.
Useful additions include:
- Drawer dividers
- Pull-out trays
- Vertical organizers
- Hidden compartments
Internal organization prevents countertop clutter.
Use Open Shelving Carefully
Open shelving works well when used strategically rather than excessively.
Best uses include:
- Displaying folded towels
- Storing daily essentials
- Holding decorative containers
- Creating visual balance near vanities
Limiting shelf clutter preserves openness.
Optimize Layouts for Narrow Bathrooms
Long narrow bathrooms require thoughtful arrangement to maintain comfort.
Effective strategies include:
- Aligning fixtures along one side
- Using sliding shower doors
- Installing narrow vanities
- Choosing wall-mounted lighting
These adjustments support smoother movement throughout the space.
Improve Airflow and Ventilation Placement
Ventilation affects comfort as much as layout. Compact bathrooms benefit from efficient airflow solutions.
Smart placement options include:
- Ceiling exhaust fans
- High wall vents
- Moisture-resistant finishes
- Proper fan sizing for room volume
Good airflow preserves materials and improves indoor comfort.
Maintain Clear Countertops for a Larger Feel
Cluttered counters make compact bathrooms appear smaller.
Keep surfaces open by:
- Storing items inside drawers
- Using wall-mounted accessories
- Limiting decorative objects
- Organizing daily essentials efficiently
Simple surfaces enhance calmness and usability.
Frequently Asked Questions
What is the minimum comfortable size for a compact bathroom layout
A functional compact bathroom can work efficiently within about 35 to 40 square feet when fixtures are arranged carefully and space-saving features are included.
Can a compact bathroom include both a shower and a bathtub
Yes, but it typically requires a combined shower-tub unit and careful placement of surrounding fixtures to maintain circulation space.
Are floating vanities strong enough for everyday use
Floating vanities are designed for durability when properly installed into wall studs or reinforced supports, making them suitable for daily use.
What type of flooring works best in compact bathrooms
Slip-resistant porcelain tile and luxury vinyl flooring are popular choices because they handle moisture well and maintain visual continuity.
Should compact bathrooms use darker colors anywhere
Yes, darker tones can be used selectively on accent walls, cabinetry, or fixtures to create contrast without overwhelming the space.
How can lighting make a compact bathroom feel taller
Vertical lighting placement and upward-facing fixtures help draw the eye upward, which increases the perception of height.
Is it better to use open shelving or closed cabinets in small bathrooms
A balanced combination works best. Closed cabinets reduce clutter while limited open shelving keeps essential items accessible and visually appealing.